
Sourdough bread has captured the hearts (and taste buds) of bakers and bread lovers around the world. Its unique flavor, chewy crumb, and beautifully crispy crust make it a favorite among artisan bakers. However, mastering sourdough is no small feat. It requires patience, practice, and an understanding of the science behind fermentation. But the rewards of creating your own sourdough bread from scratch are immeasurable.
In this blog, we’ll take a deep dive into the art of sourdough bread, from understanding the sourdough starter to perfecting the baking process. Whether you’re a beginner or an experienced baker, this guide will help you take your sourdough game to the next level.
What is Sourdough Bread?
At its core, sourdough bread is simply a type of bread made using a naturally fermented dough. Unlike yeasted breads, which use commercial yeast to rise, sourdough relies on wild yeast and lactic acid bacteria present in the environment and in the flour. These microorganisms work together to ferment the dough over a period of time, giving sourdough its signature tangy flavor and airy texture.
The key difference between sourdough and other breads is the sourdough starter — a living culture made from just two ingredients: flour and water. This starter contains both wild yeast, which causes the dough to rise, and bacteria, which create the distinctive sour flavor.
Creating Your Own Sourdough Starter
Before you can make sourdough bread, you need to create your own starter. While it’s possible to purchase a starter, making one from scratch is an incredibly rewarding process that connects you to the breadmaking tradition. Here’s how you can get started:
Step 1: Mixing Flour and Water
Combine equal parts of flour (whole wheat flour works best for starting the fermentation process) and water in a clean jar or bowl. Stir well until you have a thick but smooth paste. Cover loosely with a cloth or lid and let it sit at room temperature for 24 hours.
Step 2: Feeding the Starter
After the first 24 hours, you’ll need to feed your starter to encourage the growth of wild yeast and bacteria. Discard half of the mixture (to prevent it from growing too large) and add fresh water and flour in equal amounts. Stir, cover, and let sit again for 24 hours. Repeat this feeding process every 24 hours.
Step 3: Observing the Starter
After about 3-5 days of feeding, your starter should begin to bubble and have a slightly sour aroma. These bubbles are the wild yeast feeding on the flour and releasing carbon dioxide, which makes the dough rise. The starter should be double in size within 4-6 hours of feeding, indicating that it’s ready to use.
Step 4: Maintaining Your Starter
Once your starter is strong and active, you can either continue to feed it daily or store it in the fridge if you’re not baking frequently. If you refrigerate it, feed it once a week to keep it healthy.
Perfecting the Dough: The Key to Great Sourdough
Once your starter is ready, it’s time to move on to making the dough. Sourdough bread requires long, slow fermentation, which is what gives it its depth of flavor and texture. Here’s how you can go about perfecting your sourdough dough:
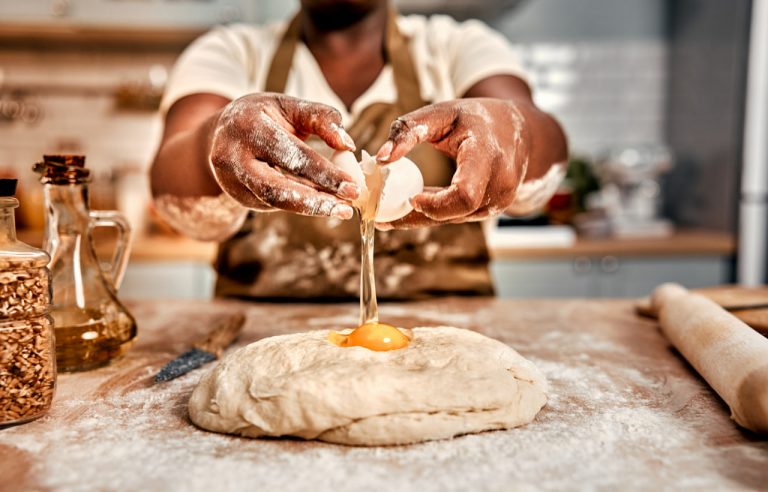
Step 1: Mixing the Dough
To make the dough, combine your starter with flour, water, and salt in a large mixing bowl. The ratio of starter to flour will vary depending on the recipe, but generally, you’ll use around 20% to 30% of the flour weight as starter. Mix until the dough comes together and there’s no dry flour left.
Step 2: Autolyse (Resting the Dough)
Let the dough rest for 30 minutes to an hour after mixing but before kneading. This resting period is called “autolyse” and allows the flour to fully hydrate, making the dough easier to handle and promoting gluten development.
Step 3: Kneading and Stretching
Sourdough bread benefits from a method known as the “stretch and fold” technique, which is gentler on the dough than traditional kneading. After the autolyse, perform a series of stretch and fold motions to develop the gluten. Let the dough rest for 30 minutes, and then repeat the stretch and fold process about 3-4 times over the next couple of hours.
Step 4: Bulk Fermentation
After the stretch and fold sessions, allow the dough to undergo bulk fermentation, which typically lasts between 4 to 6 hours, depending on the room temperature. During this time, the dough will continue to rise, and the flavor will begin to develop. The dough should roughly double in size and show signs of aeration, like bubbles forming on the surface.
Shaping Your Sourdough Loaf
Once your dough has finished bulk fermentation, it’s time to shape it. Proper shaping is essential to ensuring your bread rises evenly and maintains a good structure.
Step 1: Pre-shape the Dough
Gently turn the dough out onto a floured surface and shape it into a loose round. Let it rest for 20 minutes to relax the gluten.
Step 2: Final Shaping
After resting, you can shape the dough into your desired loaf form, whether it’s a round boule, oval batard, or baguette. Gently stretch the dough and fold in the edges, creating tension on the surface of the dough to help it maintain its shape during proofing and baking.
Step 3: Proofing the Dough
Once shaped, the dough needs to proof for several hours. You can either proof the dough at room temperature for 3-4 hours or refrigerate it overnight (cold proofing). Cold proofing develops deeper flavors in the bread and makes the final loaf easier to handle when baking.
Scoring and Baking the Bread
Scoring your sourdough loaf is crucial. It not only adds an artistic touch to your bread but also helps control the expansion of the dough in the oven.
Step 1: Preheating Your Oven
Preheat your oven to 475°F (245°C). If you’re using a Dutch oven, place it inside the oven while it’s preheating to get it really hot.
Step 2: Scoring the Dough
Using a sharp razor blade or a scoring tool (called a lame), score the surface of the dough. You can make a simple cross or get creative with designs. Scoring helps the bread expand in a controlled manner and prevents it from cracking unpredictably.
Step 3: Baking
Place your dough in the preheated Dutch oven (or directly on a baking stone) and bake for 20 minutes covered to trap steam. Then, uncover the bread and reduce the temperature to 450°F (230°C). Continue baking for another 25–30 minutes or until the bread is golden-brown with a crispy crust. The internal temperature should reach about 205°F (96°C).
Troubleshooting: Common Problems and Solutions
Even experienced bakers face challenges when making sourdough. Here are a few common issues and how to address them:
- Flat Loaf: If your sourdough loaf doesn’t rise as expected, it could be due to weak starter, insufficient fermentation, or improper shaping. Make sure your starter is strong and active, and ensure the dough undergoes proper fermentation and proofing.
- Dense Texture: A dense crumb can result from not kneading the dough enough or not allowing sufficient time for fermentation. Try extending the bulk fermentation time or adding more stretch and fold sessions.
- Underbaked Bread: If your bread is too doughy inside, it might need more time in the oven. Use a thermometer to check the internal temperature — it should read between 200°F (93°C) and 210°F (99°C).